Create and Deploy a Digital Wallet Pass in 10 Minutes with PassNinja

Updated March 23, 2026
TL;DR: Create a pass in 10 minutes
- 1. Create a new pass
- 2. Add the strip image
- 3. Add text
- 4. Create cURL command
- 5. Deploy the pass
Overview
Digital wallet passes are one of the fastest ways to deliver loyalty cards, tickets, or coupons directly into Apple Wallet or Google Wallet. With PassNinja, you can go from zero to a working pass in just 10 minutes. In this tutorial, we’ll walk through the full process step by step, and you can also follow along with the complete video guide here:
How do you create a new pass
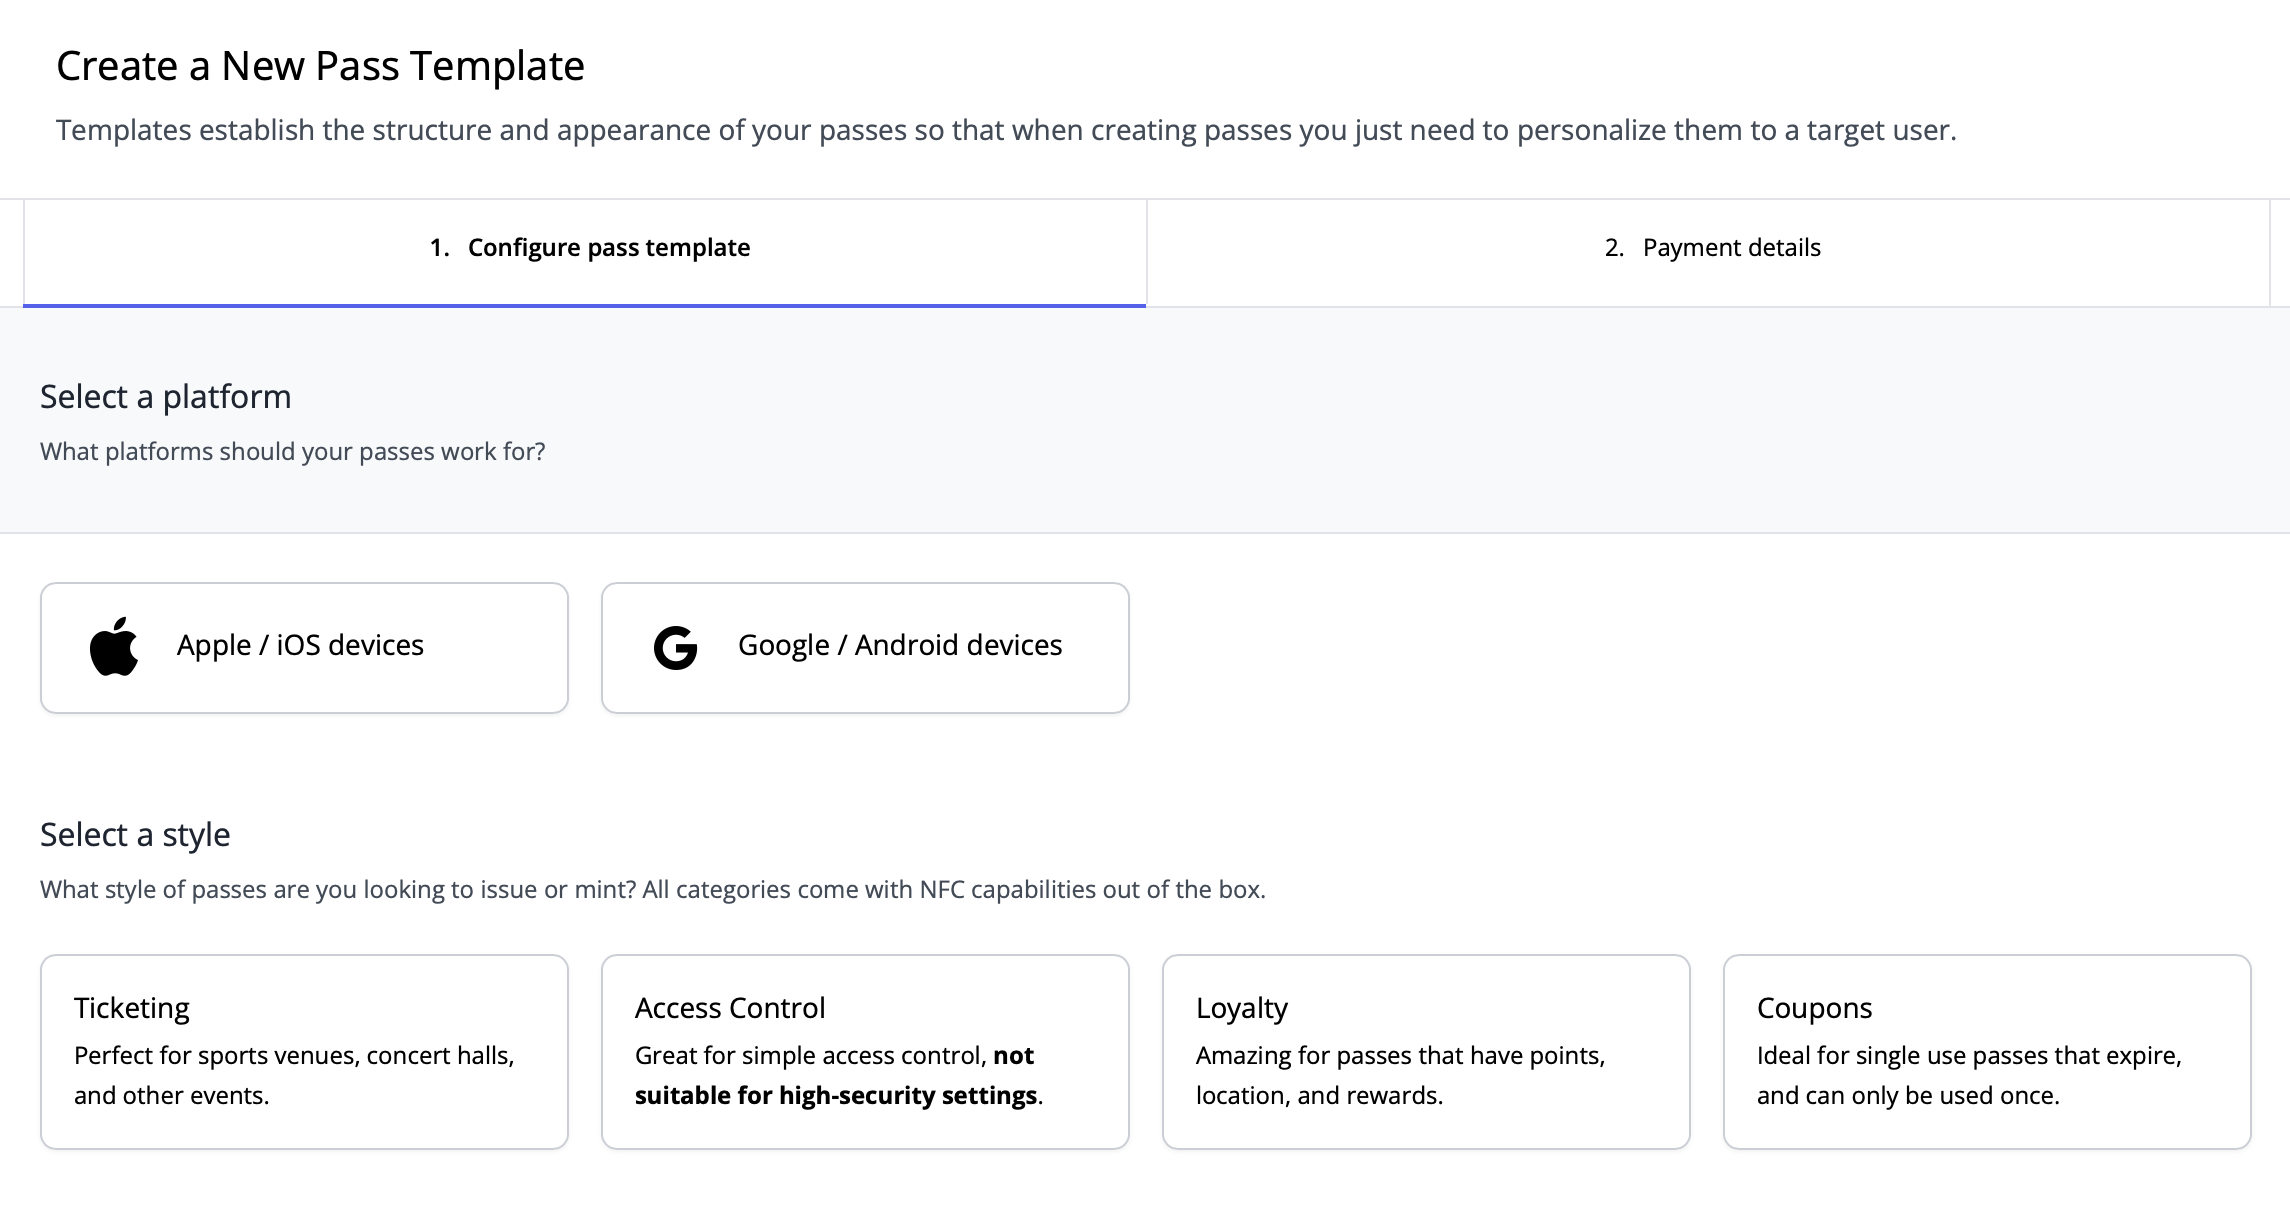
The first step is to create a new pass in your PassNinja dashboard. This is where you define the foundation of your pass, including its type and structure. Think of this as setting up the container that will later hold your text, logos, and images.
Here is where you also select the platform you want to support, either Apple Wallet or Google Wallet, and choose the type of pass you are creating. The available types include Coupon, Loyalty, Ticket, and Generic. This choice determines the layout and fields available for your pass.
In addition, you will be prompted to enter your personal or company information and provide a credit card. This ensures your account is properly set up for issuing passes and allows you to manage billing for deployments. Once this step is complete, you’ll see a unique Pass Template ID. This key is critical because it’s what you’ll use in your API calls to create and update passes. Save it somewhere safe, as you’ll need it in later steps.
How do you design the pass
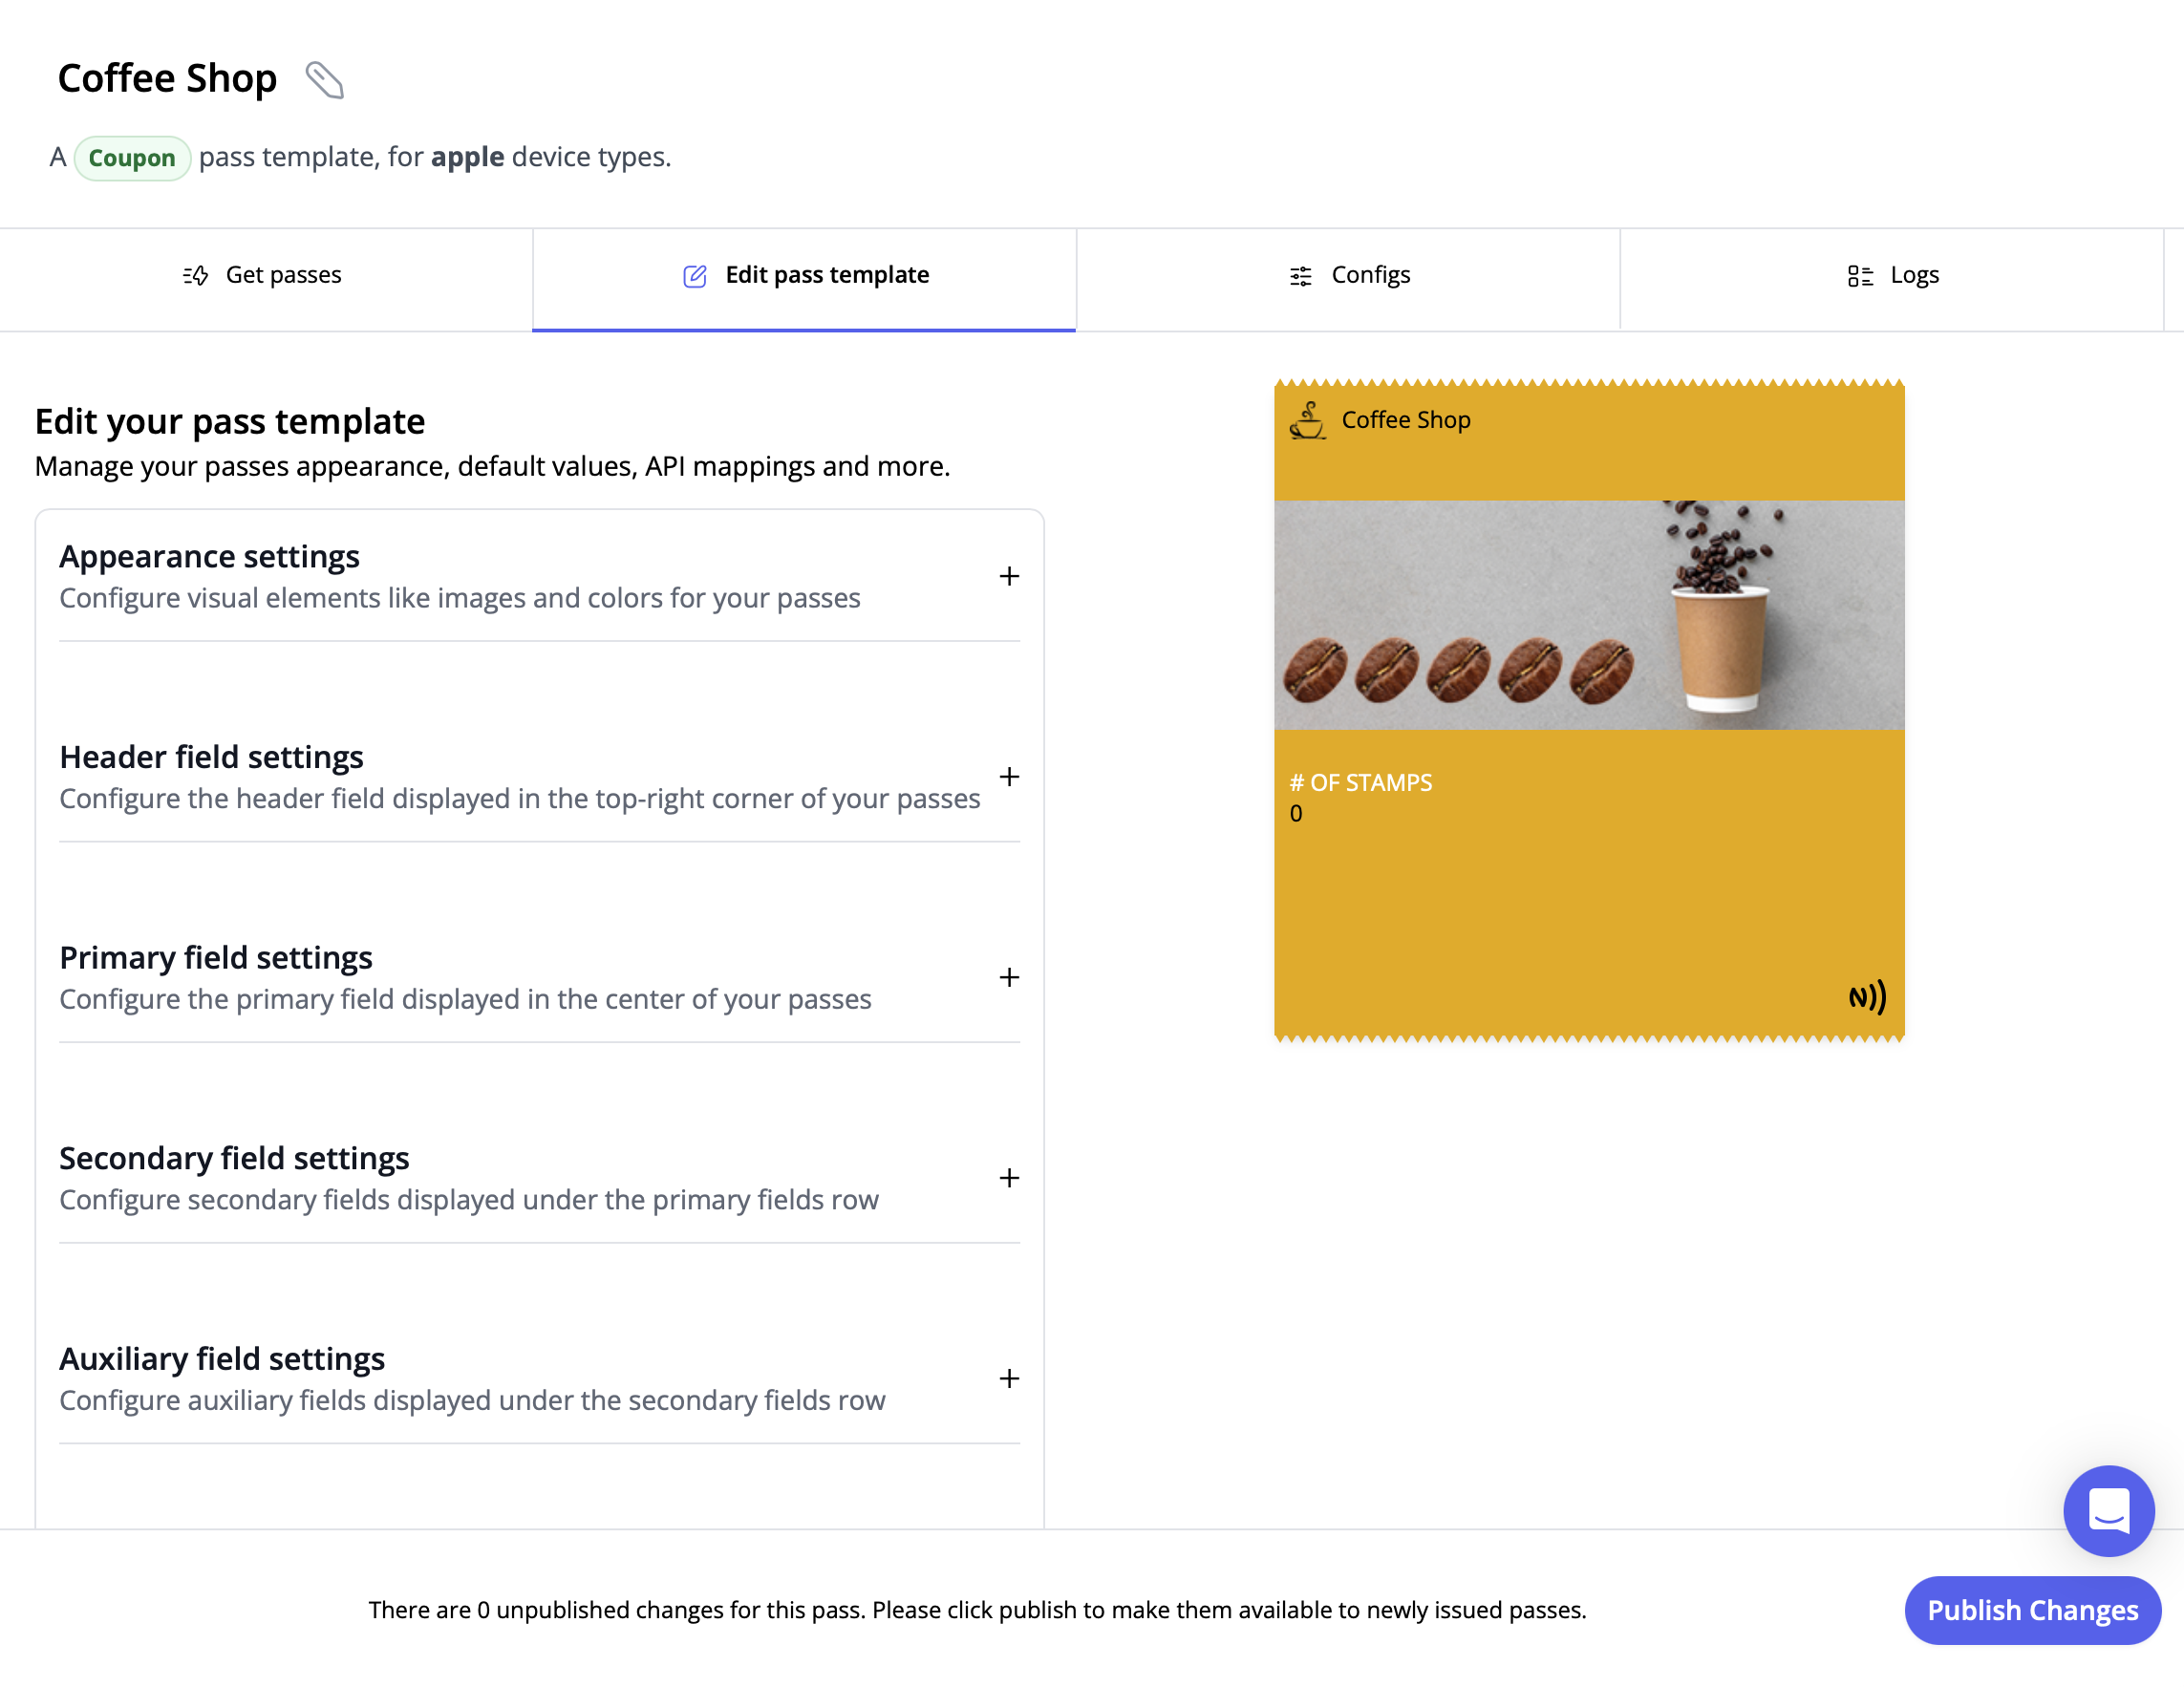
Designing the pass is the stage where you transform the basic template into something that feels branded, polished, and user ready. Within the PassNinja dashboard, you can choose which text fields should be visible to the end user and then enter the content that will appear in those fields. This might include a loyalty balance, a coupon description, or event details. Making fields visible or hidden gives you control over what information is emphasized on the pass.
In addition to text, you can upload your brand assets such as a logo and a strip image, and select the colors that match your brand identity. These visual elements are what make the pass instantly recognizable to your customers. At this stage, you also define whether the pass will include a barcode, NFC functionality, or both. This choice determines how the pass can be scanned or tapped in the real world. Finally, you can configure location settings so that the pass surfaces automatically when a user is near a specific place, such as your store or event venue.
By carefully configuring these design options, you ensure that your pass is not only functional but also aligned with your brand and optimized for user convenience. This step is where the pass becomes more than just a digital card—it becomes a branded experience that can drive engagement and loyalty.
How do you set the APIs for updates after deployment
Once your pass is designed, you’ll want to configure the APIs that will allow you to update it after deployment. PassNinja makes this easy by exposing REST endpoints for updating fields such as expiration dates, barcodes, or messages.
By setting these APIs upfront, you ensure that your passes remain dynamic. For example, you can update a loyalty balance, change an event time, change the strip image, or revoke access without requiring the user to download a new pass. This is one of the most powerful features of PassNinja.
How do you create curl code for Windows and Mac and deploy
Now it's time to generate the curl code that will create your pass via the API. Use the tabs below to switch between macOS/Linux and Windows command prompt syntax. Replace the placeholders with your actual API key, account ID, and pass template id.
<YOUR_API_KEY>: Get this from the PassNinja dashboard under Getting Started<YOUR_ACCOUNT_ID>: Get this from the PassNinja dashboard under Getting Started<YOUR_TEMPLATE_ID>: Get this from the PassNinja dashboard under Getting Startedstrip.image: Host your image (for example on Imgur, S3, or your own server) and add the direct URL
curl -X POST 'https://api.passninja.com/v1/passes' \
  -H 'X-API-KEY: <YOUR_API_KEY>' \
  -H 'X-ACCOUNT-ID: <YOUR_ACCOUNT_ID>' \
  -H 'Content-Type: application/json' \
  -d '{
    "passTemplate": "<YOUR_TEMPLATE_ID>",
    "pass": {
      "nfc.message": "1234567890",
      "strip.image": "https://yourhostedimage.com/strip.png",
      "secondary.1.value": "0"
    }
  }'
Running these commands will create your pass and return a JSON response with a landing URL. That URL is the link you’ll use to install the pass on a device.
Here's the return JSON structure:
{
  "serialNumber": "<SERIAL_NUMBER>",
  "id": "<YOUR_TEMPLATE_ID>",
  "urls": {
    "landing": "https://i.installpass.es/p/<SERIAL_NUMBER>"
  },
  "passTemplate": "<YOUR_TEMPLATE_ID>"
}
How do you load the pass to an iPhone
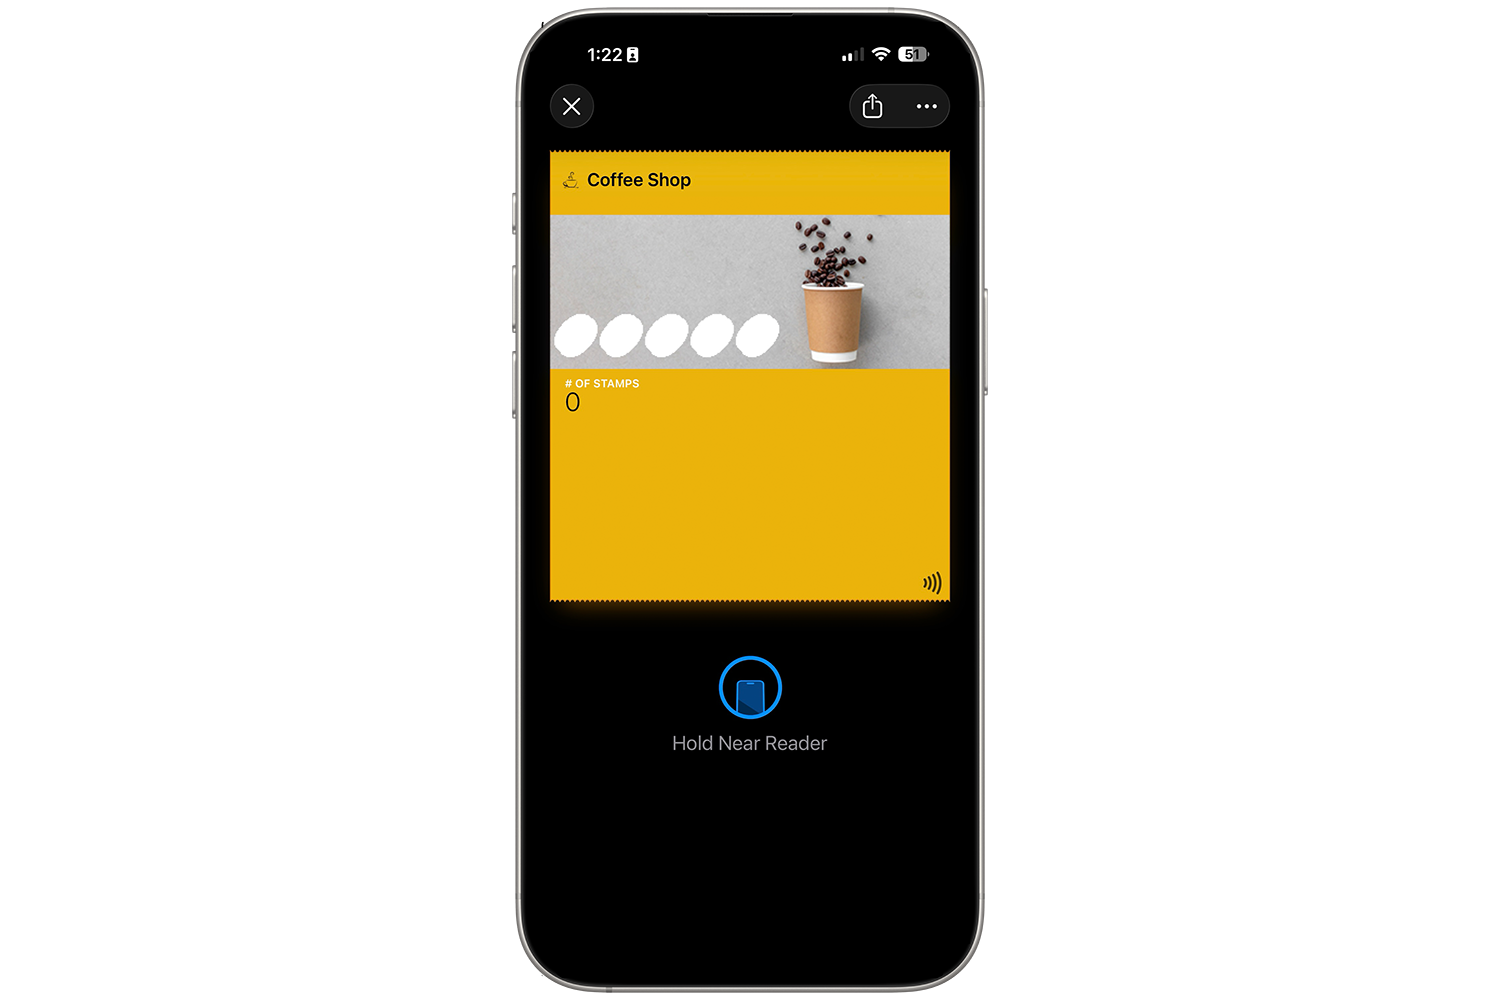
The final step is to load the pass onto your iPhone. From the JSON response, copy the urls.landing value and open it on your iPhone. This will launch Apple Wallet and prompt you to add the pass.
This step is where you see your work come to life. Within minutes, you’ll have a fully functional pass installed on your device, ready to be shared with users.
Making NFC easy with PassNinja
PassNinja simplifies the process of creating and distributing NFC enabled wallet passes. By combining a visual dashboard with flexible REST APIs and SDKs in multiple languages, it allows you to design, deploy, and update passes quickly. Most importantly, PassNinja provides the Apple NFC entitlement out of the box, eliminating the lengthy approval process and red tape typically required to enable NFC functionality on Apple Wallet passes. Whether you are building loyalty programs, event tickets, or coupons, PassNinja provides the tools to make it happen in minutes instead of months.
The ability to update passes dynamically after deployment is especially powerful. It ensures that your users always have the latest information without needing to download a new pass, creating a seamless and modern experience.
Conclusion
In just 10 minutes, you can create, design, deploy, and test a digital wallet pass using PassNinja. By following these steps, you’ll have a pass installed on your iPhone and ready to share with your users. Watch the full process in action in the video tutorial: https://youtu.be/IzXxfIwnbGI.
More articles focused on Apple Platform
When attempting to install a pass in Apple Wallet, you may encounter an error stating that the pa...
How does pass updating work on Apple Wallet?This tutorial is designed to help developers quickly understand how to make passes in Apple walle...
How to Create Apple Pass Type IDsThis guide is designed to help developers quickly generate pass types on Apple's Developer portal...
How to Create an Apple Wallet NFC encryption keysThis guide is designed to help developers quickly generate an encryption keys for NFC enabled App...
How to Update Apple Passes with the PassNinja APIWith the PassNinja API, Apple Wallet passes can be updated after creation or created as personali...
What happens when an Apple pass type ID is deletedIn this article, we'll go over what happens when you create a pass type ID, issue passes using th...