How to Create and Send NFC Passes Using Zapier

Updated March 26, 2026
TL;DR: Connect Zapier to PassNinja API to automate pass creation.
- 1. Create a Zap with your trigger (form, CRM, spreadsheet, etc.).
- 2. Add a Webhooks by Zapier action (POST request).
- 3. Configure the PassNinja API endpoint and headers.
- 4. Test the webhook to verify pass creation.
- 5. Map dynamic data from your trigger to pass fields.
Zapier is one of the most popular automation platforms, connecting thousands of apps without requiring any code. By integrating PassNinja with Zapier, you can automatically create and distribute NFC-enabled digital wallet passes whenever specific events occur in your other apps. This tutorial walks you through setting up a Zap that responds to a new member purchase on Stan.store and send out an Apple Wallet pass for in-person verification. That way, if you're organizing a run club or a boat tour, you can check people in quickly and with less fuss.
Prerequisites
Before you begin, make sure you have:
- A PassNinja account with an active pass template
- Your PassNinja API Key and Account ID (found in passninja.com dashboard)
- Your Pass Template Identifier (e.g.,
ptk_0xXXX) - A Zapier account (free tier works, but Webhooks requires a paid plan)
Step 1: Create a new Zap and set up your trigger
Every Zap starts with a trigger—the event that kicks off your automation. Common triggers for pass creation include:
- Stan Store: When a customer subscribes to your product
- Google Forms: When someone submits a registration form
- Typeform: When a new response is received
- Shopify: When a new order is placed
- HubSpot/Salesforce: When a new contact is created
To set up your trigger:
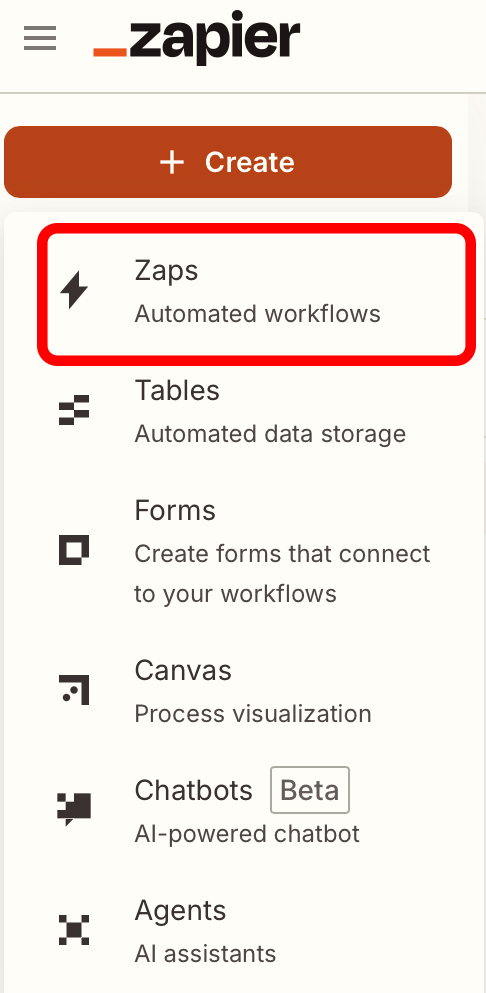
- Click Create Zap in your Zapier dashboard
- Search for and select your trigger app (eg "Stan" for Stan Store)
- Choose the specific trigger event (eg "New Membership" triggers when a customer purchases a recurring membership)
- Connect your account and configure the trigger (eg Login with your Stan account credentials)
- Test the trigger to pull in sample data (eg Customer Name, Customer Email, etc from Stan Store)
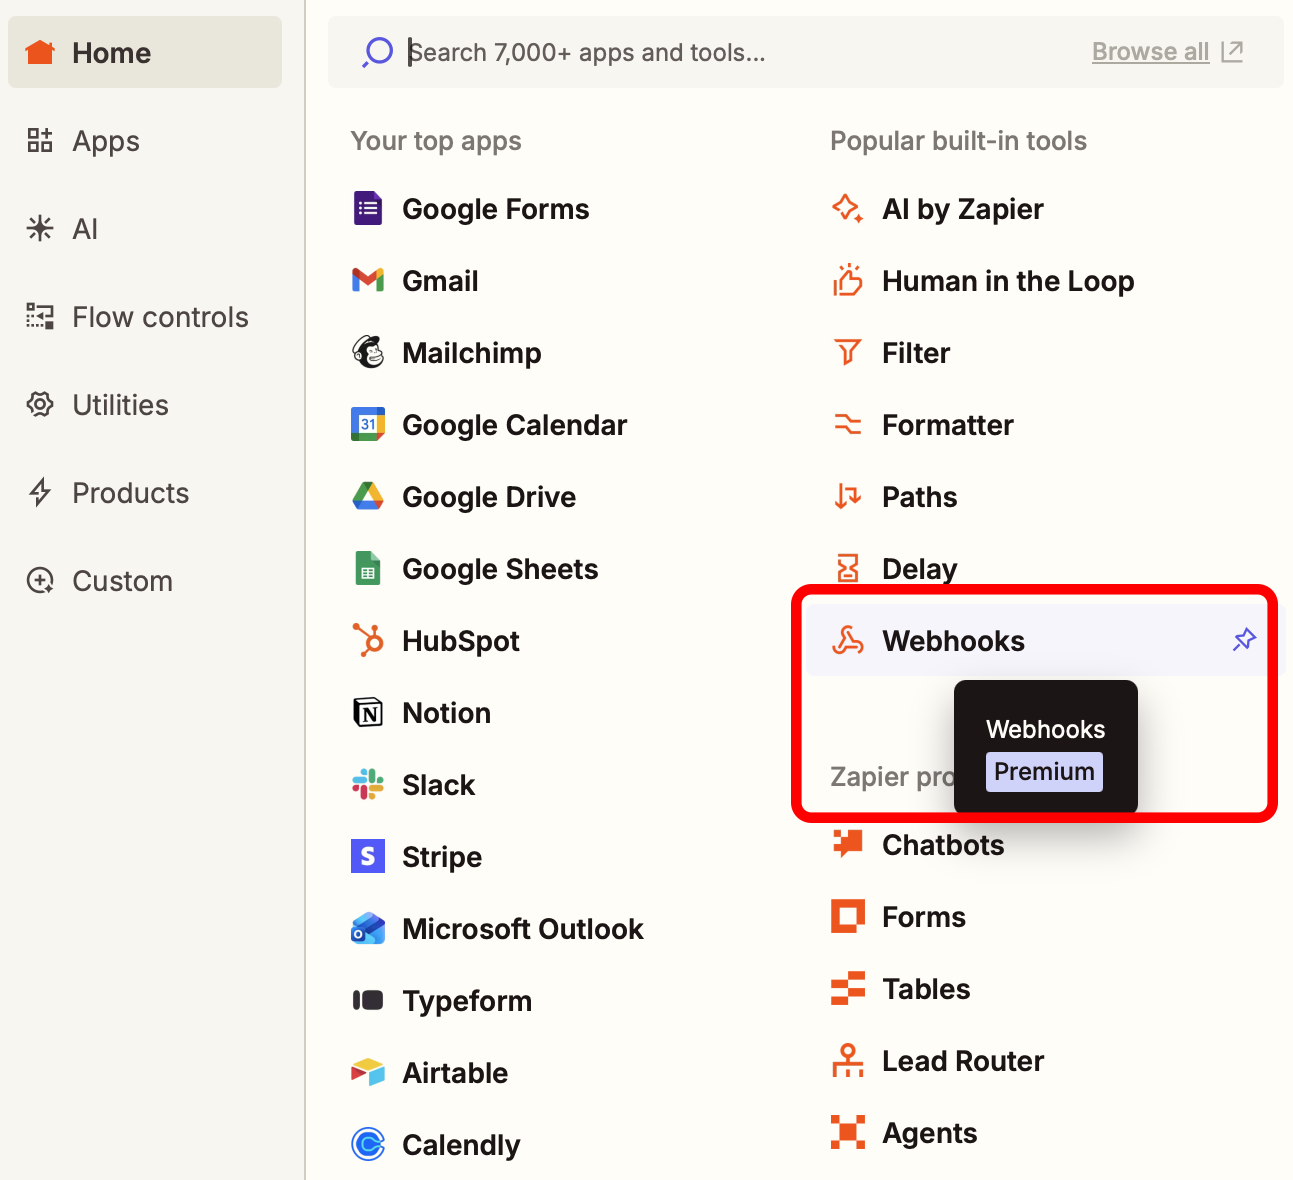
Step 2: Add a Webhooks by Zapier action
The Webhooks by Zapier action allows you to make HTTP requests to any API, including PassNinja.
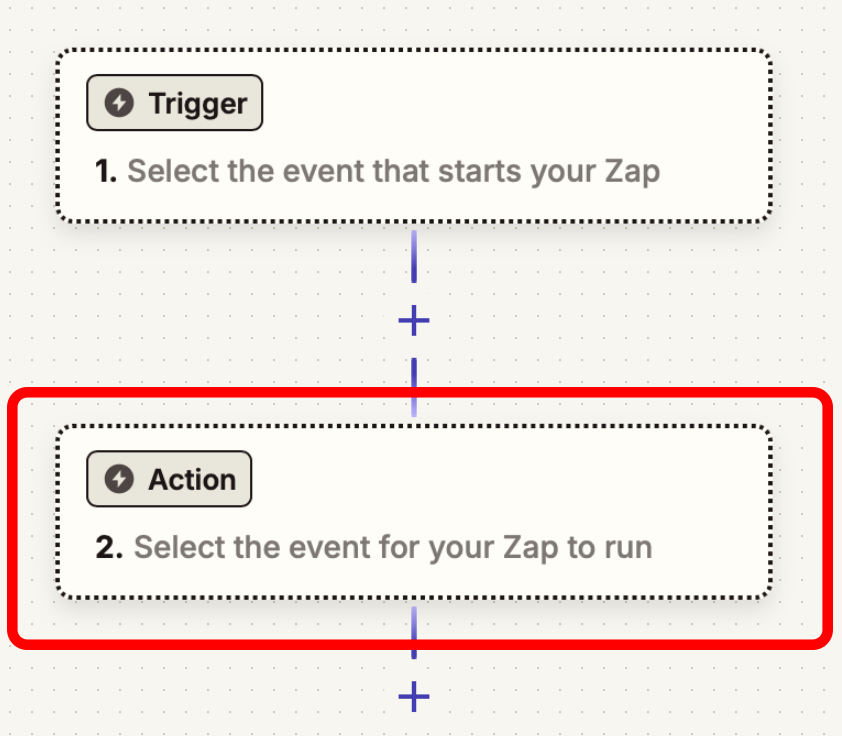
- Click the + button to add an action
- Search for Webhooks by Zapier
- Select Action event, Create Custom Request
- Click Continue
- Select Method: POST
Step 3: Configure the PassNinja API request
Now configure the webhook to call the PassNinja API with generic data. That way we can test out making passes before we add dynamic data.
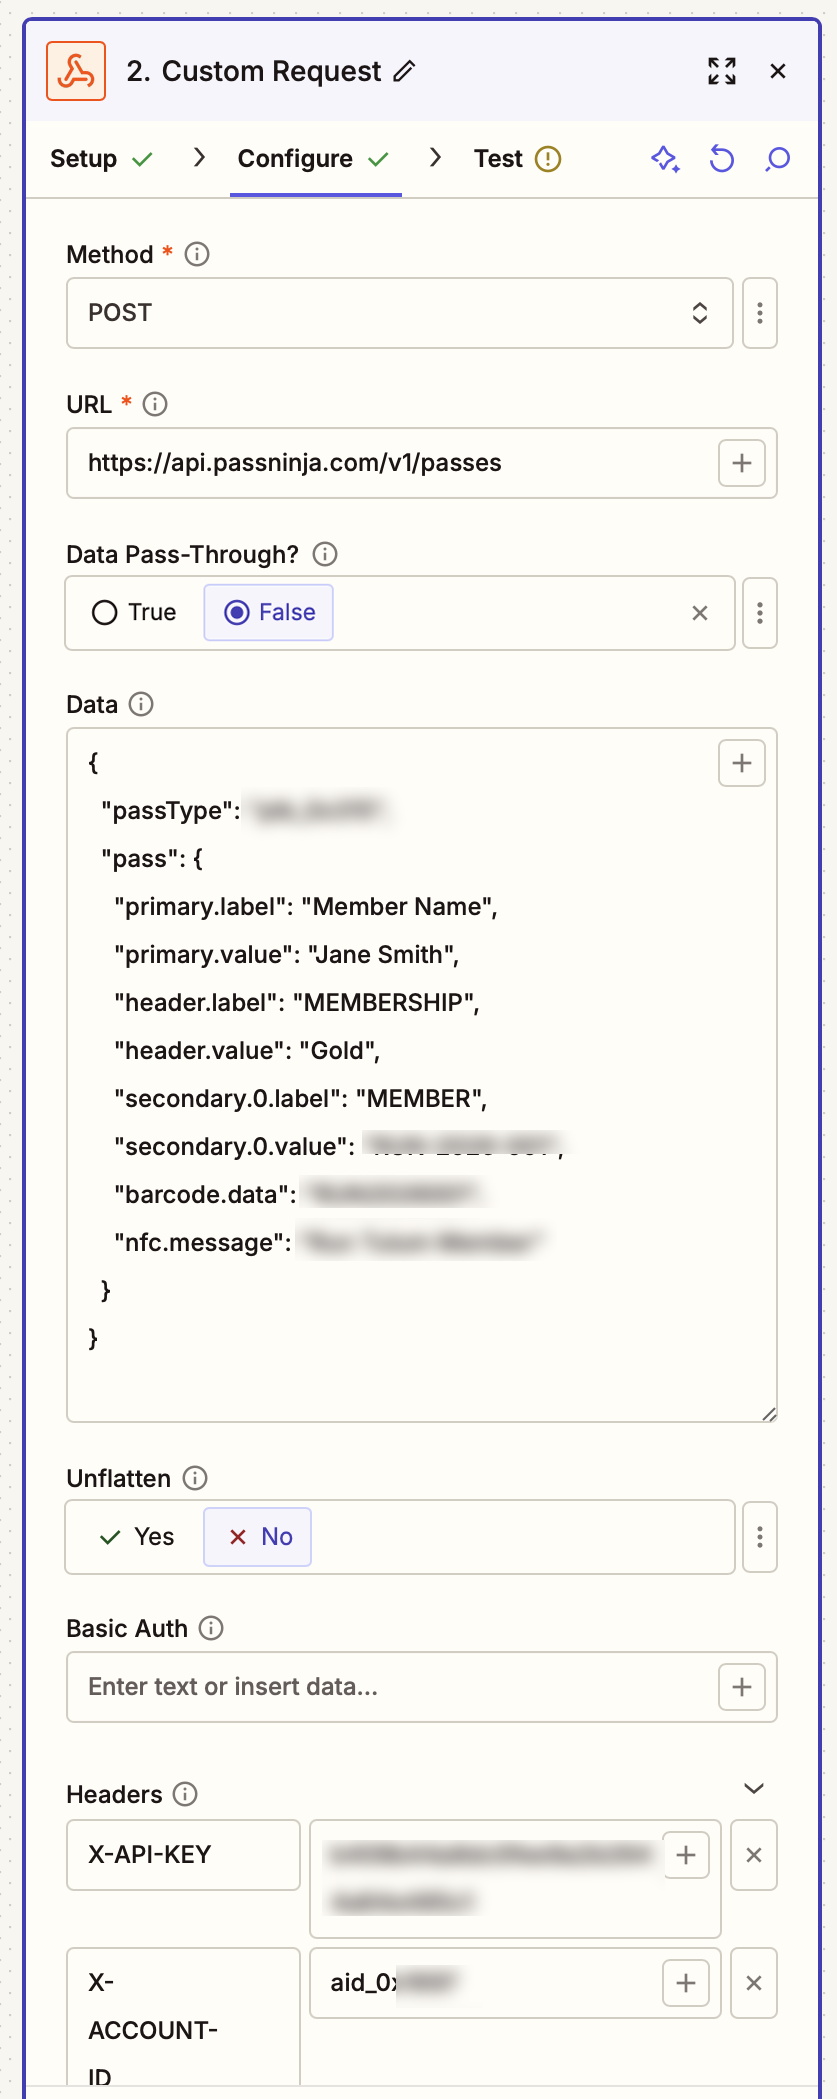
- URL:
https://api.passninja.com/v1/passes - Data Pass-Through: Select
False - Data: Place JSON:
{
"passTemplate": "ptk_0xXXX",
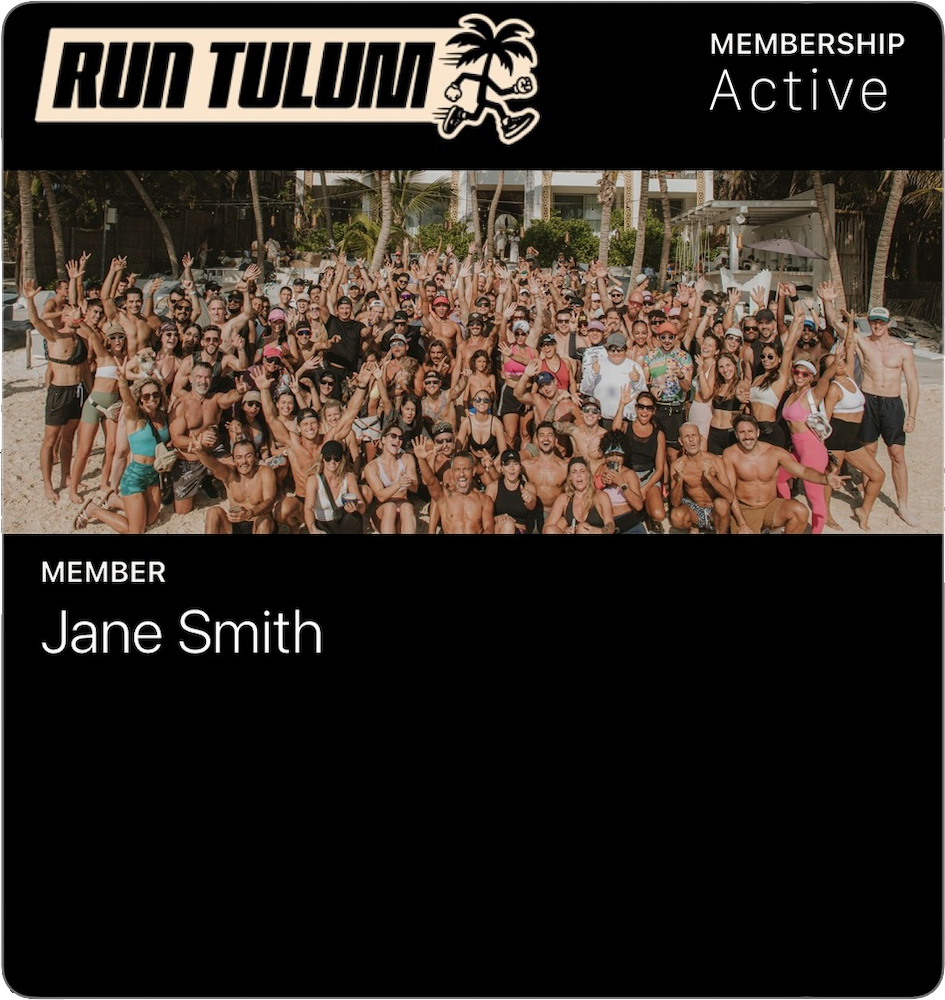
"pass": {
"primary.label": "Member",
"primary.value": "Jane Smith",
"header.label": "MEMBERSHIP",
"header.value": "Active",
"barcode.data": "1234567890",
"nfc.message": "1234567890"
}
}
Note: The field names (like
primary.label,nfc.message, etc) must match the API mapping names defined in your PassNinja template. Check the "Getting Started" tab of your template for the exact field names.
- Headers: Add these required headers:
| Key | Value |
|---|---|
| X-API-KEY | your_api_key_here |
| X-ACCOUNT-ID | your_account_id_here |
| Content-Type | application/json |
Note: The Values are defined in your PassNinja pass template. Check the "Getting Started" tab of your template for the exact API key, and account ID (aix_0xXXX).
Step 4: Test the webhook
Before continuing, test your webhook to ensure it works:
- Click Test step
- Zapier will send a POST request to PassNinja
- You should see a successful response with the pass data
The response will include (data-out):
{
  "id":"abc123def456",
  "passTemplate":"ptk_0xXXX",
  "serialNumber":"abc123def456",
  "urls":
  {
    "landing":"https://i.installpass.es/p/abc123def456"
  }
}
The urls.landing is the universal link that works for both Apple and Google passes.
Step 5: Dynamic data assignment
Instead of hardcoding values, you can map data from your trigger to the pass fields. Click the + button next to any field to insert dynamic data from previous steps in your Zap.
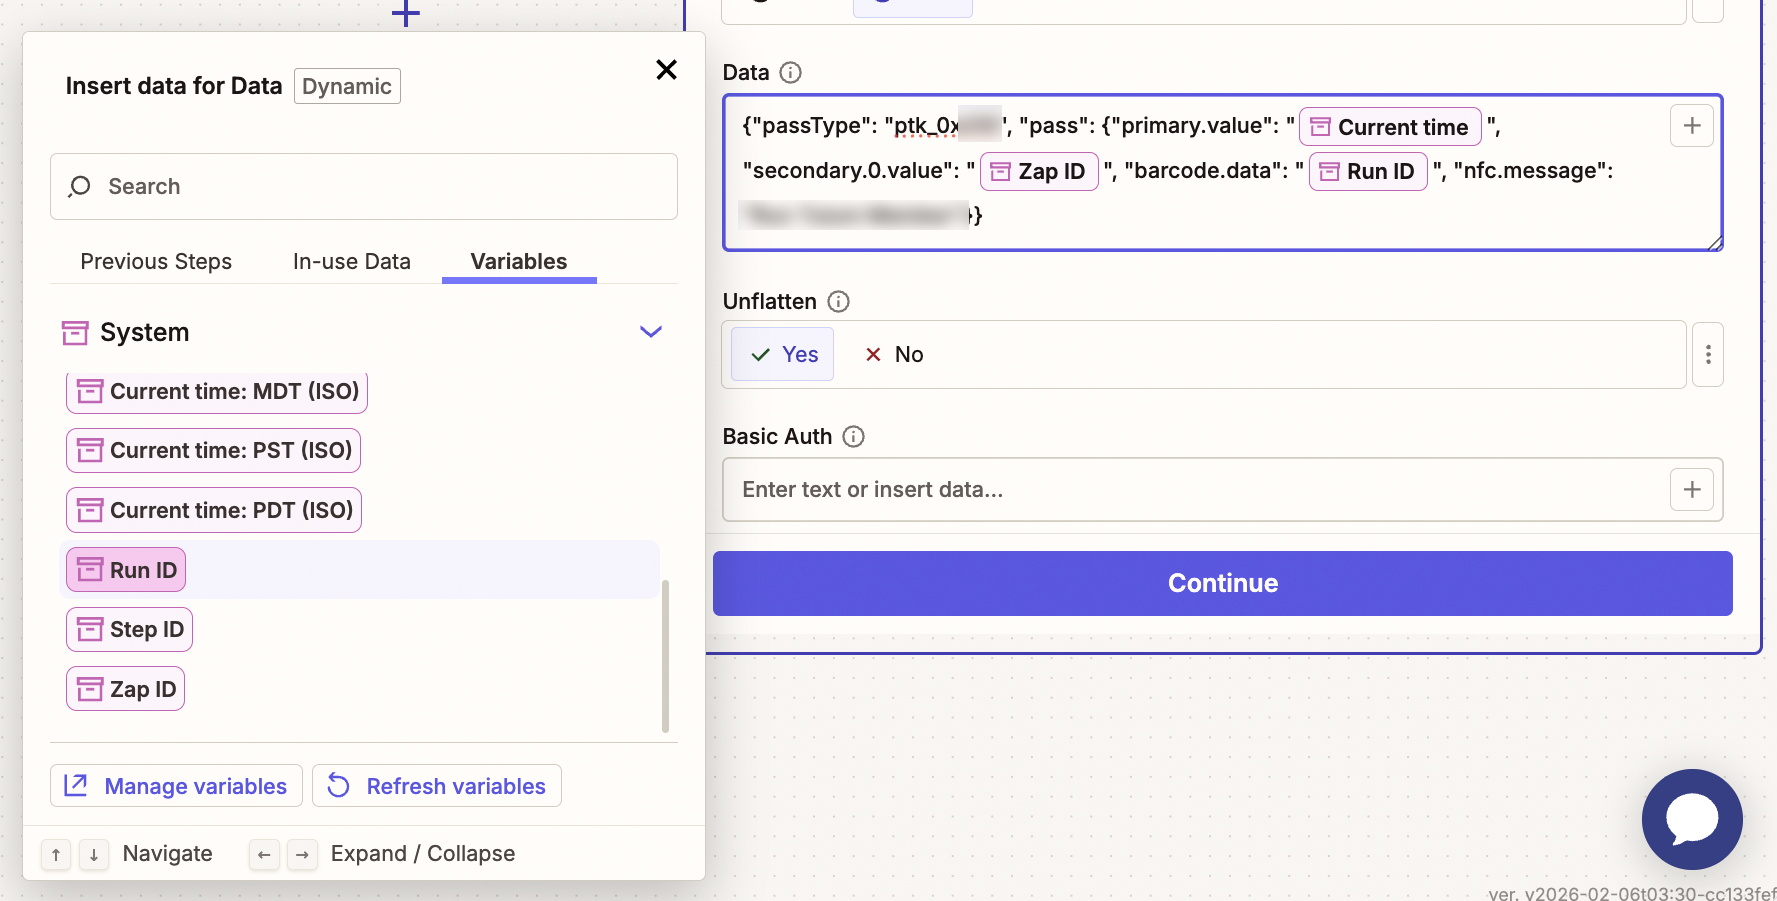
For example, if your trigger is a New Membership subscription from Stan Store:
- Map the Full Name to
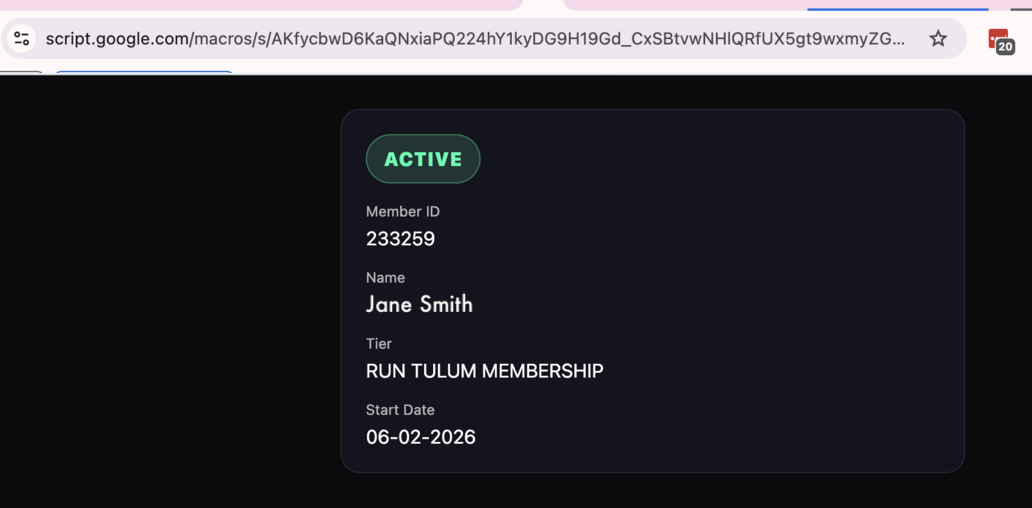
primary.value - Map subscription status Active to
header.value - Use a web link lookup for the barcode data or NFC message to validate membership status in real time
This allows each pass to be personalized based on the incoming data.
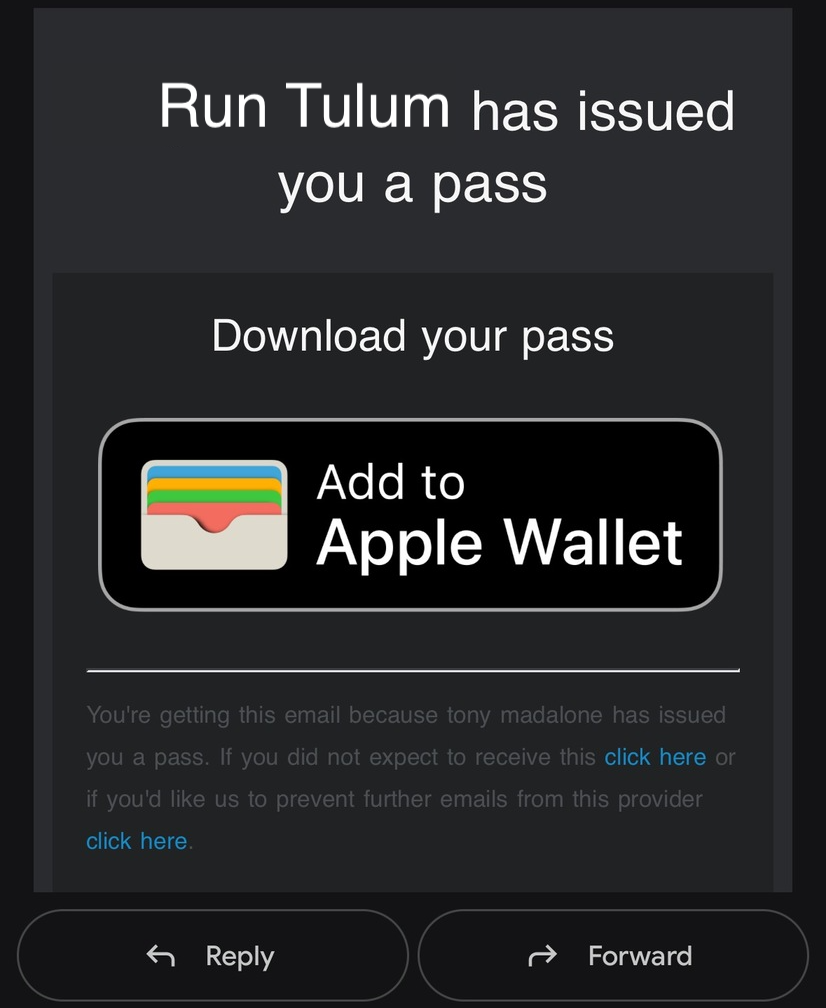
Step 6: Distribute passes (via email or text messages)
Wallet passes created with PassNinja can be sent via email or SMS using automation platforms like Zapier, which integrates with messaging and communication services such as Twilio, Gmail, Outlook, SendGrid, and MessageBird. By capturing the pass install link (urls.landing) returned by the API and delivering it through any supported messaging app.
Passes can also be sent directly using the PassNinja API by creating a pass with your pass data and distributing the returned install URL via PassNinja email or SMS infrastructure. When creating a pass with PassNinja, delivery can be handled automatically by including email or SMS parameters directly in the pass creation request. Simply add name, email address or phone number to a recipient object, and PassNinja will generate the pass and send the install link for you.
Place JSON:
{
  "passTemplate": "ptk_0xXXX",
  "pass": {
    "primary.label": "Member",
    "primary.value": "[1. Full Name: Jane Smith]",
    "header.label": "MEMBERSHIP",
    "header.value": "Active",
    "barcode.data": "https://script.google.com/macros/s/AKfycbwD6KaQNxi/exec?=[1. ID: 1234567890]",
    "nfc.message": "https://script.google.com/macros/s/AKfycbwD6KaQNxi/exec?=[1. ID: 1234567890]",
  }
  "recipient": {
    "name": "[1. Full Name: Jane Smith]",
    "email": "[1. Email: jane@smith.com]"
  }
}
For implementation details, see the PassNinja API documentation
Advanced: Handling errors with Zapier Paths
For production workflows, you may want to handle API errors gracefully:
- Add a Paths by Zapier action after the webhook
- Create paths based on the webhook response status
- Path A (Success): Continue to send email/SMS
- Path B (Error): Send an alert to your team or log the error
Troubleshooting
Error: 401 Unauthorized
- Check that your
X-API-KEYandX-ACCOUNT-IDheaders are correct - Ensure there are no extra spaces in the header values
Error: 400 Bad Request
- Verify that
passTemplatematches your template key exactly - Check that all required fields are included in the payload
- Ensure field names match the API field names in your template
Error: 500 Internal Server Error
- Contact PassNinja support with your request details
Making NFC easy with PassNinja
This setup is ideal anytime you need digital to meet physical. Apple and Google Wallet provide fast, on-the-spot validation, and NFC makes the handoff effortless.
PassNinja keeps the workflow simple with a consistent API and dashboard. Pair that with Zapier and you can automate creation, personalization, and delivery without building a custom backend. It is a quick path to loyalty programs, event tickets, or access control with minimal development effort.
| Trigger | Pass Type | Delivery |
|---|---|---|
| New Stan Store subscriber | Membership card with NFC | |
| New Shopify order | Loyalty card with points | |
| Event registration form | Event ticket with QR code | SMS |
| Appointment booking | Access pass with barcode | SMS |
Using Webhooks by Zapier with PassNinja's REST API lets you populate fields dynamically, set expirations, and send install links instantly. The result is a flexible system that adapts to different campaigns or user segments while keeping the experience seamless.
Conclusion
Integrating PassNinja with Zapier opens up endless possibilities for automating digital wallet pass creation and distribution. Whether you're onboarding new customers, issuing event tickets, or managing loyalty programs, this no-code approach lets you deliver NFC-enabled passes without building custom infrastructure.
By following the steps above, you can connect any of Zapier's 5,000+ apps to PassNinja and create a seamless experience for your users.